Everything you need to set up, use, and care for your Haven gear.
Core Setup
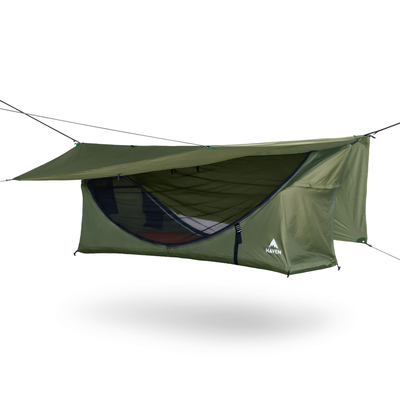
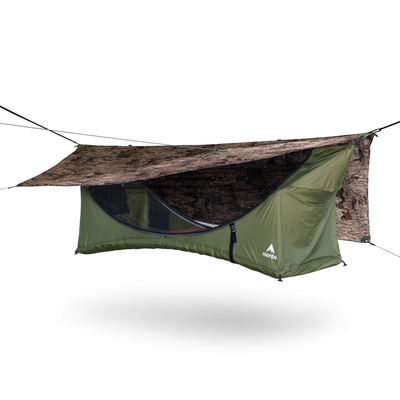
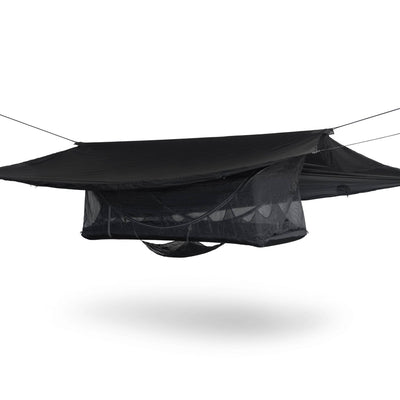
Haven Tent Setup
Learn the quickest way to hang, tension, and dial in your Haven Tent.
01
Bivy Mode
All models of the Haven Tent can be pitched on the ground as a bivy when trees aren't available - perfect for above treeline, sparse forests, or open areas like the Bonneville Salt Flats.
Setup:
Choose a flat spot and lay out your tent system.
Use trekking poles, sturdy sticks, or other supports to hold up the rainfly.
Plant each pole a few inches from the end of the hammock body.
Run straps or guylines from the pole to your stakes, angling them away from the pole for stability.
Secure the end carabiner to the pole handle with the strap or guyline.
Pole setup tips:
Use two or three anchor points per pole for better support and a tighter pitch.
Adjust trekking pole height so the hammock body just barely touches the ground when empty.
Tighter rainfly tension creates more interior space.
Once the structure is set:
Insert the spreader bars, pad, and your gear as usual.
All features - bug net, pockets, and spreader bars - work the same as when suspended.
Bivy mode keeps you ready for any environment where hanging isn't possible.
02
Using the Guylines
Guylines offer adjustable tension for various attachments.
Avoid attaching static lines to the tent's corner toggles - use the included guylines with sliding tensioners instead.
The corner toggles are designed to secure the rainfly corners and are not load-bearing.
Apply tension to the guylines, not directly to the toggles; outward tension to the toggles can cause them to tear off the tent.
03
Getting the Right Hang Angle
For optimal comfort and to prevent damage to your Haven Tent and suspension, use the proper hang angle.
Ideal hang angle is generally between 15 and 30 degrees.
Use a Hang Calculator or similar method to estimate your angle if needed.
The correct angle helps ensure your head and feet are properly positioned and prevents overstressing the straps or trees.
04
Spreader Bars
The Haven Tent features two horizontal spreader bars designed to create flat sleeping space and keep the sidewalls away from your body.
These bars are not designed to support dynamic loads or misuse - avoid sitting or standing on them, or applying strong outward force, as this could cause them to bend and break.
For support inside the tent, use the structural ridgeline or straps rather than leaning heavily on the spreader bars.
The spreader bars should be inserted into the four designated pockets on the tent body at the head and foot ends, above the suspension arc.
Do not place the spreader bars underneath your sleeping pad.
05
Bug Net
The Haven Tent features an integrated bug net designed to keep insects out while maintaining airflow.
You can use the tent with the bug net fully deployed, partially open, or fully stowed depending on conditions.
When not in use, the bug net can be stuffed into the large mesh pocket at the foot end of the tent along with the spreader bar.
06
Lounge Strap
The Lounge Strap is pre-installed on each tent and is a webbing strap that runs along the underside of the head side of the tent.
It buckles to the opposite side and allows you to recline the tent into a floating lounge chair by pulling the strap downward until it cinches tight.
This feature is ideal for a slight recline while sleeping or relaxing with a book.
07
Ridgeline + Storage
The structural ridgeline of the tent is designed to bear the entire load without damage, making it ideal for gear storage.
Clip a carabiner from your bag, boots, or other items to the ridgeline to keep them organized and off the ground.
Slide your gear toward your head or feet for convenient access and to keep it protected from the elements.
Weather
Rainfly Setup
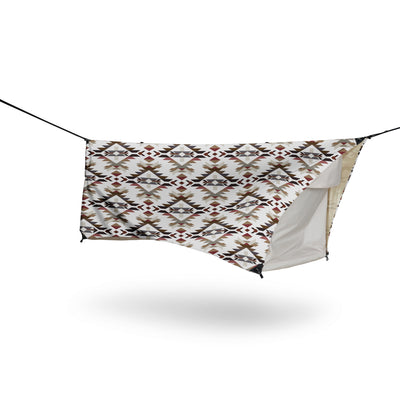
Attach, secure, and get the most out of your integrated rainfly.
01
Attaching the Rainfly
Once the rainfly is set up initially, you typically don't need to remove it unless you prefer to.
Steps to attach:
Set up the tent as normal, with the carabiners attached to the tent.
With the tent detached from the tree straps, slide a carabiner up through one rainfly corner eyelet and down through the adjacent one.
Pull the carabiner completely through both eyelets and then attach it to the tree strap.
Repeat on the other side - the fly is now attached.
02
Securing the Rainfly to the Ridgeline
Your tent includes two fly loops, each with a toggle, on the ridgeline.
Wrap the fly loops around the ridgeline and secure with the toggles to keep the rainfly centered and stable.
When conditions are clear, you can leave the fly rolled up and secured so you can quickly deploy it if weather changes.
At night or in questionable weather, secure the rainfly so you can easily reach up, detach the toggles, and deploy it over the tent.
03
Spectre Silpoly Rainfly
The Silpoly Rainfly installs quickly and can stay attached for packing and storage.
To attach:
Secure the corner toggles to the loops on the hammock body.
Use the integrated zippers and snaps at the ends to close or open for ventilation.
Attach interior hooks to elastic loops where provided.
Packing tips:
Fold the hammock body in half over the spreader bars.
Roll the system tightly around the bars.
Flip the bottom up and finish rolling so it fits easily in the stuff sack.
Pitching options:
Guy it open for maximum airflow.
Guy it closed for increased rain protection.
04
Spectre: Dyneema Rainfly
The Dyneema Rainfly installs easily and can remain attached for packing and storage.
To attach:
Secure the corner toggles to the loops.
Zip and snap the ends closed, taking care not to snag the lightweight fabric.
Attach interior hooks to elastic loops for a secure seal.
Pitching options:
Guy it open for maximum ventilation.
Guy it closed for rain protection.
Secure in storm mode for high wind and severe weather.
For best rain protection, guy the fly away from the bug net to reduce condensation.
05
Managing Condensation and Avoiding Leaks
Moisture inside the rainfly is almost always condensation, not a leak.
Rainfly fabrics are highly waterproof (e.g. Dyneema ~20,000 mm hydrostatic head). Actual leaks are rare unless the fabric is damaged.
Condensation forms when warm, moist air from inside your hammock meets the cooler surface of the rainfly - like a cold soda can on a hot day.
To reduce condensation:
Increase ventilation by opening zippers, creating gaps, or going to "porch mode" when conditions allow.
Avoid breathing directly onto the rainfly surface when possible.
In humid conditions, expect some condensation and use your pad and quilt to keep you dry and comfortable.
06
Stargazer Mode: Rainfly Up with the Bug Net On
Since the bug net is fixed to the tent, a lot of people ask how to roll the rainfly up while still keeping bug protection. It depends on whether you want the net usable or not.
Rainfly up, bug net stowed:
Unzip the bug net all the way and stuff it into the large mesh pocket at either end.
Roll up one side of the rainfly and use its attached fly loop to wrap around the ridgeline (and around your RidgeLight, if installed) to secure it.
Repeat on the other side.
Rainfly up, bug net zipped (Stargazer Mode):
Wrapping the fly loops around the ridgeline blocks the bug net zipper from closing all the way, so keep bug protection by free-wrapping the fly loops around something other than the ridgeline itself:
Zip the bug net all the way up first.
Free-wrap each fly loop around something other than the ridgeline itself - if you have a RidgeLight installed, its two silicone ties are an easy anchor point.
Roll up each side of the rainfly the same way, securing the fly loop around that anchor instead of the ridgeline.
No RidgeLight? Any similar small loop or tie-point works just as well - the key is just keeping the fly loops off the ridgeline itself so the zipper can travel freely.
Comfort
Insulated Pad Setup
The Haven Tent is built around our pad. Here’s how to inflate and dial it in.
01
Using the pump sack
The fastest and easiest way to inflate your pad is with the PowerPump, but if you don't have one, you can quickly inflate your pad with the included pump sack.
Steps:
Connect: Snap the valve stem located on the bottom of the stuff sack into the valve on your sleeping pad.
Prepare: Pull out the internal second liner of the stuff sack.
Inflate: Blow a column of air into the open end of the stuff sack.
Transfer: Push the air downward and into the sleeping pad.
With a little practice, you can inflate your pad in under 5 minutes - much quicker and easier than using your own breath.
02
Shifting the pad inside the tent
If you find yourself leaning to one side within the tent, it's likely that your pad has shifted.
To fix it, sit or lie in the center of the hammock, brace with your feet or knees, and use your elbow or hand to push the pad back toward the center.
Adjust until your body feels level and supported.
Storage
Spectre Storage & Gear
Where to stash your gear, shoes, and pack when camping in a Haven Spectre.
01
Using the Gear Sling
The Haven Spectre adds a gear sling to the bottom of the hammock — perfect for bigger items or anything you don't want inside with you, like dirty shoes or wet flip-flops.
It hangs underneath and out of the way, so your sleeping space stays clean and clear.
02
Stashing Your Backpack
You can hang your backpack on the end of the hammock — it stays covered by the rainfly, but it becomes hard to reach.
A better option is to keep it right inside with you: clip the pack's handle to the ridgeline and rest the bottom on the spreader bar. Now it's easy to reach up in the middle of the night — grab your Haven Camp Pillow or anything else you need, then stash it away again.
03
Pockets & Bear Country
Every Haven model includes two big end pockets plus pockets along the side for smaller items.
In bear country, never keep food, deodorant, or other scented items in your pack inside the tent. Store scented items well away from camp to stay safe and comfortable all night long.
No Trees
Haven Stand Setup
No trees, no problem — set up your Haven anywhere with the Stand.
01
Using the rainfly poles
Your Haven Stand includes rainfly poles that slide through pre-drilled ports in the ridgebar.
Insert each pole completely through its port, wiggling as needed to get around the internal shock cord.
Once the pole is through, thread its end through the rainfly corner eyelet.
Attach the included clip to the pole end and secure the metal wire to the port on the stand's leg.
Adjust tension by pulling the clip upward to your desired tightness.
02
Fixing the wobble
A slight wobble in your stand is normal.
If it bothers you, push the legs inward toward the center of the ridgepole.
This levels the back stabilizer leg and removes most of the wobble.
Pack Up
Take Down
Ready to go? Here’s the easiest way to pack up your Haven.
01
General Takedown Guidelines
Ensure your tent is completely dry before packing; long-term moisture can lead to mildew.
If you must pack it wet, unpack and dry it thoroughly at home before storing for an extended period.
There's no single correct way to pack your tent - do what works best for you.
Recommended approach:
Keep the rainfly attached to the tent.
Remove the pad and spreader bars to keep the packed tent compact enough for the bag.
For a visual walkthrough, refer to the takedown video for technique and packing tips.
Accessory
Haven CampFly
More coverage, more protection, more privacy — hanging it, guying it out, storm mode, and packing it away.
01
Hanging the Fly
The Camp Fly is our biggest fly — roughly 12 ft x 9 ft with 4,000 mm waterproofing, built to give you more privacy, more protection, and more coverage than the standard rainfly.
In the bag: the fly, stakes, guylines, shock cord, and two ultralight carabiners. The shock cord is the piece people overlook — it keeps tension in the system and cuts down a lot of the flapping and noise that comes from wind.
Hanging it:
Find the peak at the top of the fly and clip your carabiner there.
Don't clip it in the same spot as the hammock. Our other rainflies integrate right into that carabiner, but the Camp Fly is much bigger by design — clip it there and you end up with a lot more fly on one side than the other.
Use a daisy chain loop instead, about 2 ft out from the hammock, then do the same on the other side.
Work out to where it starts to be a little bit snug. That's your balanced hang.
02
Raising It Higher with a Guyline
When the daisy chains aren't in the right spot — or you just want the fly higher — hoist it with one of the included guylines.
Make a loop in one end of a guyline. Nothing fancy here: a little figure-eight loop.
Feed it right through the loop on the tree.
Take that loop back down and connect it to your carabiner.
Hoist it up to the height you want.
The easiest place to tie it off is actually back into the carabiner — use that to cinch it, then finish with a single slipknot. Double it up if you don't want it to slide at all.
Taking it down is the payoff: pull the tail and the whole thing comes down. If the tail is in your way while you're camped, just tie it back out of the path.
Hanging it this way gives you more headroom to walk around underneath the fly.
03
Guying It Out
There are a lot of different places you can guy out from — the end corners, the midpoints, and the points in between. We designed this fly to match the unique geometry of the Haven Tent system, so those points are there for a reason.
Attaching: feed the shock cord through the loop and then back through itself. It doesn't have to be complicated — a single slipknot means you can pull it and undo it really easily. But if it's going to be crazy or windy, sometimes it's worth doing a bowline or something else.
Mixing configurations: the two ends don't have to match. Guy one end open and close the other down when wind is coming from one direction but you still want space. Leave one end connected to the daisy chain and put the other a lot higher so you can walk in and out. Guy out the center along with the corner for more room as you move around underneath, and you'll still have quite a bit of visibility.
When there's nothing to stake to: sometimes you don't find trees or even ground in the right spot, so you have to be a bit creative. If a tree is in the way and you can't guy straight out, guy to the tree. Use a rock, a squiggly little tree, the big trees, the ground — everything in your environment.
Anchor down all the loose ends. When the fly is loose it billows in the wind and moves around quite a bit.
04
Storm Mode
When you're locking the fly down for storm mode, it's nice to have it cover the hammock itself. Lower it until you can't see your hammock at all underneath the fly — hooking it right back to the daisy chain works well here.
On both ends you'll find snaps that help hold the ends closed. Feed one shock cord through and anchor them together.
For more space while you're still battened down, guy out that middle point and take the corner straight down to the ground. Do it on all four sides and it looks so clean. You can either access it from the end or kind of climb underneath.
Even locked down, the fly is guyed away from the hammock rather than pressed up against it — that's what keeps condensation down and airflow moving.
05
Packing It Away
One nice thing about the Camp Fly: if you leave it guyed down, you can pack the tent away from underneath the fly. If it's raining, you're not getting wet as you pack the tent, and then you do the Camp Fly separately.
Once the tent is away:
Collect the stakes first — you'll use them to help roll up the fly.
Fold it in half: hold the carabiner and connect it to the carabiner on the other end.
Hold one end so you can get it really tight, then fold it over.
Disconnect the top carabiner and take it off.
Fold it down smaller than the stuff sack — but keep the carabiners accessible so you can grab them next time.
Use the stakes and start rolling it up. If you went a little wide, fold it in as you go.
Start at the ridge, not the bottom. Rolling from the ridge lets all the air escape. Roll the other way and it traps air, and it's impossible to fit back in the stuff sack.
Be sure to walk around the site before you go. Don't forget any stakes or guylines — it's happened to the best of us.
Accessory
Haven PowerPump
Inflate your air mattress in seconds — and power your devices — with the rechargeable PowerPump.
01
Using the PowerPump
The Haven PowerPump inflates your air mattress in seconds, needs no extra nozzles or attachments to connect to Haven mattresses, and doubles as a USB backup battery for your phone or other devices.
Heads up — new version: the video above shows the original round PowerPump. The current PowerPump is square (about the same size), adds a clip on top so you can hang it from places like your ridgeline, and has a dimmable LED lantern on the bottom.
To use it:
Double-click the power button to turn it on. The double-click is intentional — it keeps the pump from switching on inside your bag and draining the battery.
Press the outlet against your pad's valve (no adapter needed) and let it inflate until firm.
Close the valve, then use the bottom lantern for camp light and the built-in battery to recharge your devices.
With 3,600 mAh on board, you'll have plenty left over to charge a phone. In a pinch it even works great for stoking a campfire.
Accessory
Haven RidgeLight
A dimmable LED light strip that runs the length of your ridgeline.
01
Using the RidgeLight
The RidgeLight is a dimmable LED light strip compatible with all versions of the Haven Tent.
Clip the carabiner on each end to your ridgeline.
Pull to adjust the strip until it's centered and taut.
Use the little loop for the spreader bar to hold the switch in place.
Dim it down low for a warm, sleep-friendly glow.
Power it from any USB power bank — the Haven PowerPump works great. And when you're not using it on the ridgeline, it makes a really cool lantern.
Accessory
Haven NightLight
Small rechargeable LED lights that clip and strap anywhere around camp.
01
Using the NightLight
The Haven NightLight is a small rechargeable LED light with a clip and a strap, so it goes almost anywhere — spreader bars, trekking poles, your bike, or loose around camp. It's a smaller companion to the RidgeLight.
To strap it to a bar, set the light against the bar, pull the strap around, and it's connected — quick, easy, and always where you left it.
Click the power button to cycle through three brightness levels.
Hold the power button for a strobe — handy as a caution light on the back of a bike.
The kit comes with two lights, red and white. Red preserves your night vision and is less visible over long distances; white is plenty bright to read by.
Accessory
Whoopie Slings
Ultralight, infinitely adjustable suspension for trees that are too big or too far apart.
01
Using Whoopie Slings
Whoopie slings weigh next to nothing and open up where you can hang — around trees that are too big around, or too far apart for a short strap tail.
The parts: an adjustable loop that connects to your tree straps, and a fixed eye (the loop that doesn't slide) that goes onto your hammock.
How it works:
Pull the tail to take tension out of the system. The "bury" holds it in place like a Chinese finger trap — the more weight you add, the harder it grips the tail.
To lower the hammock again, take your weight off and pull the sliding side of the adjustable loop.
Make micro-adjustments — raise one side a little or lower the other — to get the sleeping platform as flat as possible.
Accessory
Insulated Pad Cover
Extra warmth for cold nights — beats "cold butt syndrome" and quiets the pad.
01
Fitting the Pad Cover
The insulated pad cover fights "cold butt syndrome" — in a hammock you may have plenty of insulation above you but only a thin layer beneath, letting cold air chill your back and seat. The Haven Tent already reduces this with its insulated air mattress; the pad cover adds warmth for colder nights.
Lay the pad cover on top of your pad, matching the head and foot ends (it's directional).
Tuck it into the corners.
Secure it in place with the buckles.
Because it's the only pad cover designed specifically for hammock camping, the insulation is zoned — coverage for your legs, more for your core, and the most under your midsection. It also quiets pad movement and protects the mattress, and folds into a great pillow when you don't need the insulation. Comes in two sizes: Standard (original Haven Tent) and XL (Haven XL and Haven Safari).
Accessory
Spectre Straps
Haven’s lightest, longest tree straps — 3.28 oz and a 25 ft span.
01
Hanging with Spectre Straps
Spectre straps are Haven's lightweight tree straps — the straps weigh just 3.28 oz and stretch extra long (150 in each) for a 25 ft total span, so they pack small and handle almost any spacing.
Two parts: a 1-inch webbing strap that wraps the tree, and a whoopie sling that adjusts. The fixed eye is compatible with all hammock systems.
Wrap the webbing around each tree.
If a tree is too big — or the straps don't line up — add a daisy-chain extension. Each has 10 segments for adjustability and adds 39 in (1 m) of reach.
Pull the tail of the whoopie sling to take up the slack until the hammock sits right where you need it.
The whoopie sling works like a Chinese finger trap: as you weight the hammock, the bury grips the tail and the loop stays in place.
Accessory
Hitch Mounts
No trees, no problem — pitch your Haven off your car or truck. Two versions: the Mammoth Mount XL and the Bare Bones XL.
01
Mammoth Mount XL
The Mammoth Mount XL is a hammock hitch mount built to be extra strong — rated up to 450 lbs — and compatible with all Haven Tent models and traditional hammocks too. Adventure Hammock Systems updated the design: the arms are now powdercoated steel for a black-on-black look, they telescope and lock with built-in pop pins, and each arm has an integrated attachment tab for your hammock. Same dimensions and the same 450 lb rating as before — it is about a pound heavier with the steel arms, and there is no extra arm hardware to install or keep track of.
Leave the receiver section on your hitch (you can keep it there as you drive around).
Slide the arms into the main frame and push each one all the way in until it is fully seated. The arm dimensions were updated slightly so they seat cleanly every time.
Pull the pop pins, telescope the arms out to the height you want, and let the pins lock back in.
Add the hitch riser extension if you want even more height.
Hang your Haven straight from the integrated tabs on the arms — nothing to install first — and lie completely flat.
The top sections are solid bars, so it doesn't rattle or make noise when you get in and out. If the hammock swings, it rests against the back bar, which stops the motion — nice if you don't like the hammock to move a lot. Best of all, it doesn't block the tailgate and gets better gas mileage than a rooftop tent. It also takes our awning kits directly, with no adapters required.
Heads up: the overview video at the top of this guide was filmed on the previous arm design. The mount goes together the same way, but the current version has the telescoping steel arms and built-in tabs you see in the setup video above.
02
Bare Bones XL
Bare Bones XL is our favorite way to pitch a Haven Tent — or a regular hammock — off the back of your car or truck. The stand comes with a hitch piece (leave it in the receiver) and six pieces of tubing.
Insert the largest tubes first.
Add the small connecting pieces.
Finish with the tubes that have the end for your hammock straps.
Hang your hammock — straps aren't included, so leave your own on the stand.
If your receiver sits low (this truck's was 18 in off the ground), add the 6-inch riser for more height. Bare Bones XL is large enough for every Haven Tent model — even the Safari — and fits an 11 ft gathered-end hammock too. Put the head end a little higher and pull the lounge strap to start in a sitting mode.
Accessory
Repair Kit
Patch and reseal your Haven in the field so a small tear won’t end your trip.
01
Making Field Repairs
The Repair Kit comes with a couple of patches and a tube of UV-activated sealant — and it works on the entire tent, rainfly, and pad. Unlike the cheap one-time epoxy in most kits (which can take up to 24 hours to cure), this sealant is reusable and cures in as little as 30 seconds.
Using the UV sealant:
Make sure the area is clean and dry.
Apply the sealant, overlapping onto undamaged material about a quarter inch.
Work in the shade — UV light is what cures it, so it sets fast once you bring it into the sun.
The sealant also reseals seams: if the seam tape on your rainfly or hammock breaks down, remove the broken segment and apply sealant to both the inside and the outside.
Using the patches (pad or hammock body):
Cut a patch to size with about a half inch of coverage on the edges, and round the corners so it won't peel.
For a hole in the hammock body, apply the patch on the inside so your weight helps hold it in place.
Both the tape and sealant stay flexible, so you can still pack and roll your gear. If the hammock body itself was punctured, treat it as compromised and hang low to the ground to be safe.